Asana time tracking
Register time for individual projects. Monitor work hours. Improve productivity the way the pros do.

Unlimited users
Unlimited projects
Works on every platform


benefits
How can you benefit from Asana integration
When you configure our integration, it provides insights into how much time your team is spending on different projects.
Get accurate reporting based on data gathered from Asana.
Maintain projects profitability by setting time and financial budgets.
Streamline project management and estimating with time tracking information.
Generate invoices automatically according to tracked time.
Stop switching between apps and tabs as you work.
Keep your data save by managing users' access.
see how it works
Check out the video to see how simple our Asana integration is to use


features
Explore our features and discover the full potential of TimeCamp integration
Keeping track of activity
You can track the time spent on a specific task if a person is working on many different projects at the same time.
Manage projects
Establish revenue and expenses effortlessly and immediately check profitability in real time.

Get reports
Bill clients according to time worked - measured in detail.

Desktop App
The app is discreet and stays in the foreground, so you never forget to track your work time.

reviews
Check what others say about TimeCamp
Guide
Learn more about Asana


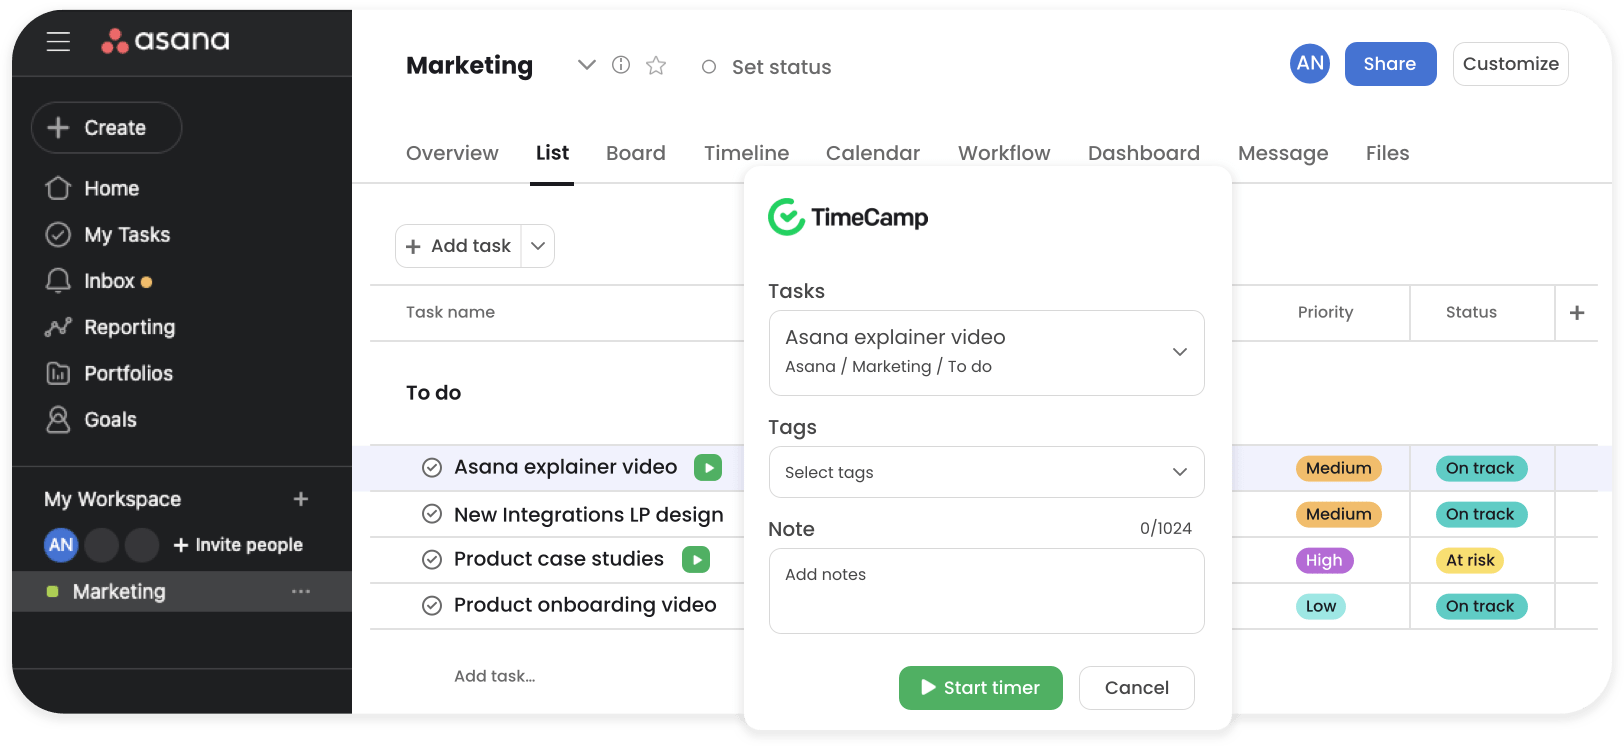
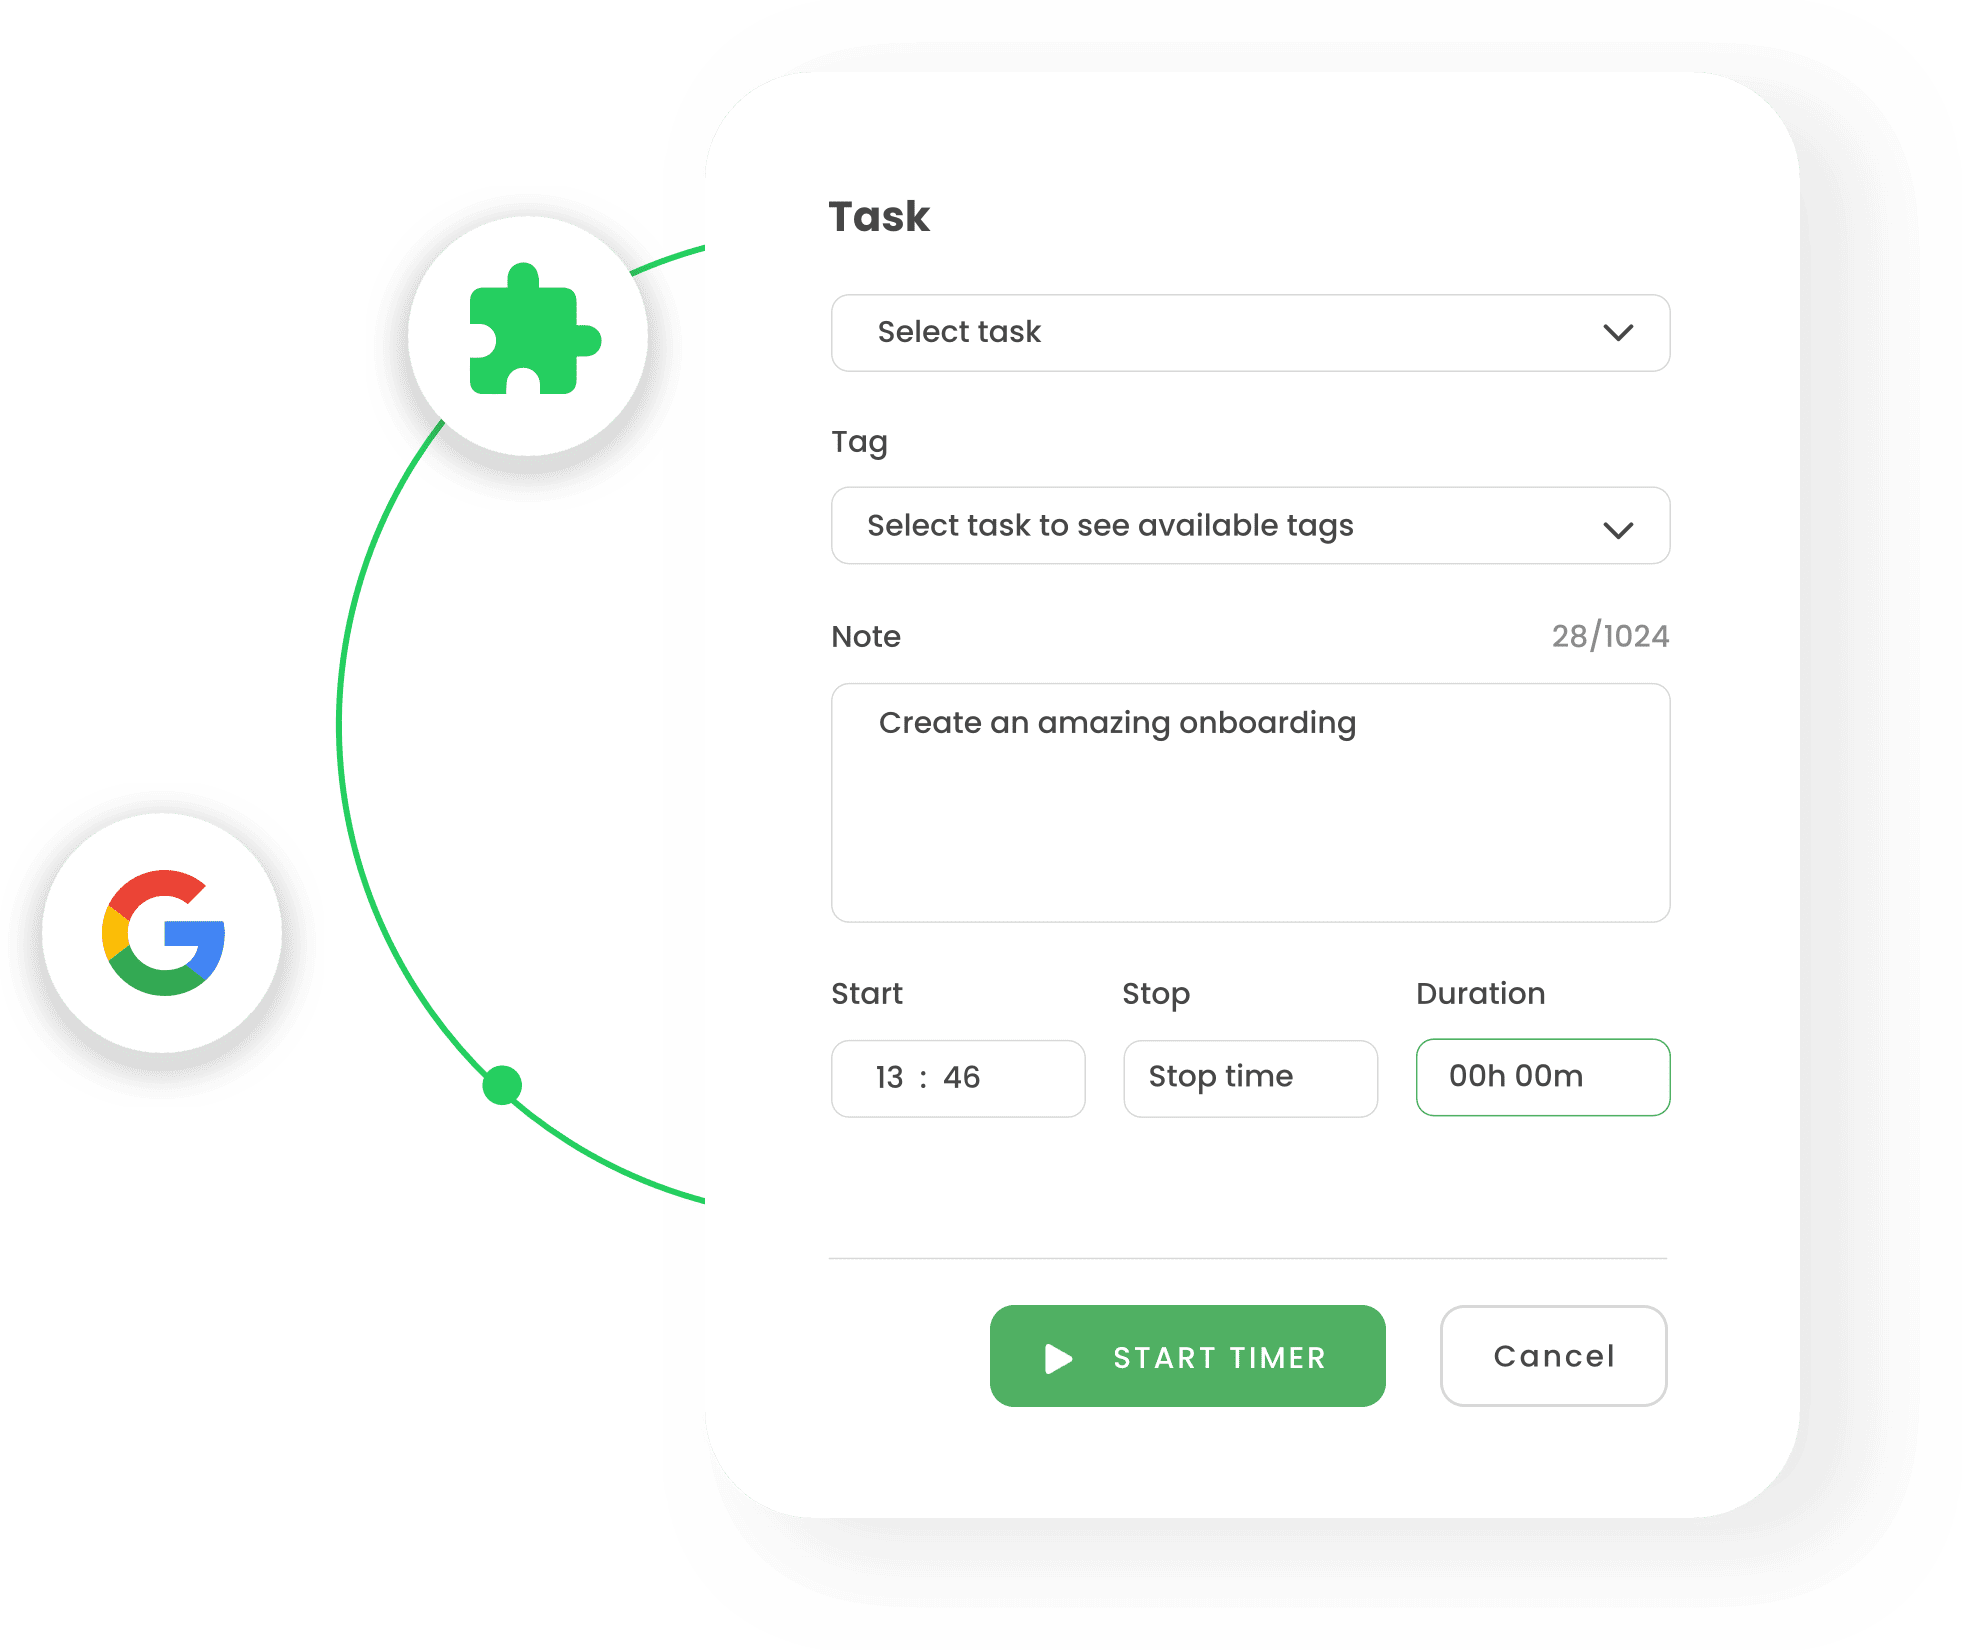
chrome extension
Track time directly in Asana
Chrome Plugin
Now, thanks to our Google Chrome plugin, you and your team can easily track time directly in Asana.
 Download Chrome Plugin
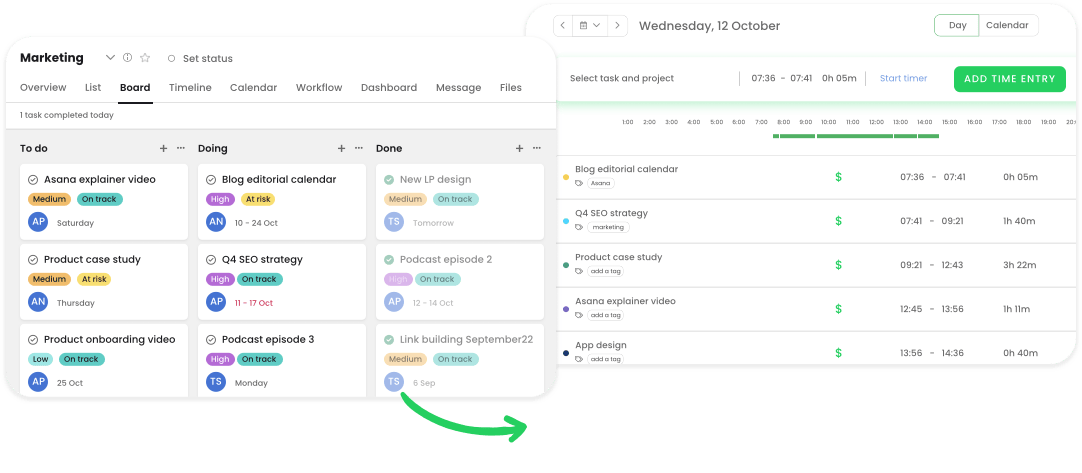
TimeCamp and Asana integration
TimeCamp offers the best time tracking with Asana. The integration will have you tracking the time spent on each task without leaving the platform. It provides a clear picture of how long each project takes, allowing you to bill your clients accurately.
Time tracking is an integral part of our daily lives. It is a necessary skill that everyone should have, and there are various tools to do it more effectively. Asana time tracking integrations are popular among people looking to manage their time better.
Does Asana have time tracking?
Asana allows teams to organize, track and manage their work. Although there is no built-in time tracking feature on the platform, it offers many time tracking integrations. With the TimeCamp Asana time tracking integration, you will know the amount of time spent on your tasks.
You will get detailed reports with insights that allow you to square up with clients. Asana offers a seamless way to track your time and manage your tasks. If you ever run into issues or require more details, there's an excellent support team that is willing to help.
How it works
TimeCamp integrates with Asana to enable time tracking of any project in one place. With this app, you can import assignments and categorize them accordingly. Thanks to the TimeCamp time tracking Asana integration, you can log hours or minutes of your project, task, or subtask.
Once logged in, you'll need to confirm the time tracking integration and choose the workspaces to synchronize with TimeCamp. Navigate to the project management page to track time using TimeCamp's timesheets. You may also use desktop or mobile apps for time tracking.
How to enable the TimeCamp and Asana integration
To enable TimeCamp and Asana time tracking integration, you'll need admin privileges. Once logged in, go to TimeCamp's settings and click integrations > Enable > Enable the integration. Choose the workspaces to synchronize to TimeCamp and start tracking your time spent on projects.
Let's elaborate on these steps!
Step 1: Sign up for TimeCamp if you don't already have an account
Create your TimeCamp account for free. If you already have one, simply sign up to begin the Asana time tracking integration.
Step 2: Navigate to the Integration bookmark
Click the Settings button and go to Add-ons bookmark. A list of bookmarks will come up.
Step 3: Click Enable
Once you see Asana on the list of integrations, click "Enable".
Step 4: Connect your TimeCamp and Asana accounts
Click the "Enable the integration" button to integrate your TimeCamp and Asana accounts.
Step 5: Confirm the integration
TimeCamp will redirect you to Asana's login page if you're not logged in. On this page, you may need to confirm to enable the time tracking integration. Or the integration will proceed automatically.
Step 6: Synchronize your workspaces to TimeCamp
Now, it is time to select which workspaces to synchronize to TimeCamp. You can also invite people assigned to workspaces. From now, TimeCamp can automatically import all of your tasks and projects.
You can now track the time taken to complete each task. Also, you can download the TimeCamp Chrome extension to track time directly in Asana.
Benefits of Asana time tracking integration
There are several benefits of tracking time in Asana. When integrated with TimeCamp, the platform allows you to track time in one app. It has a powerful free plan with many helpful features for teams.
Here's a list of some benefits of Asana time tracking integration:
Track time in just one app
TimeCamp and Asana integrations make for seamless time tracking in one app. When dealing with multiple projects, jumping aimlessly from one task to another is easy. This lack of focus can be detrimental as most people end up not finishing any of their tasks.
However, tracking the time you spend on tasks from a single interface improves your focus. You'll become more motivated to do more when you know how much time each task will take.
Boosts your project management and billing
Asana time tracking integration does not only measure your time spent on tasks. It also allows you to assign money budgets to your tasks and measure their profitability. You can assign billing rates to tasks and projects and bill your customers accurately.
The billing features do not come free of charge, but there's a 14-day free trial period for you to explore them.
Capacity and productivity reporting
Asana enables seamless capacity and productivity reporting. Time tracking on the app only requires one click, making it easy to report the time your team spent on tasks or running payroll. Time tracking integrated Asana allows your team to do more.
Powerful free plan
TimeCamp's free plan comes with many great features for users. It allows free time tracking for Asana, and you can track time for unlimited tasks and projects. However, an upgrade is necessary if you require features such as billing management or the ability to connect with more than one app.
With TimeCamp's free plan, your team will start tracking projects, improve productivity, and never miss a deadline.
Unlimited users
TimeCamp allows unlimited users and thus is a perfect tool for teams. Thanks to the budget tracking features, you can easily control deadlines with time budgeting. TimeCamp also offers timesheet approvals, invoicing, attendance, productivity reports functionality, and much more.
What's more, the tool is free for unlimited users. So, your team can test TimeCamp without paying a dime. They will track time on the go with mobile apps.
Task management tools integration
TimeCamp allows integration with many different task and project management tools. If you ever require integrations with tools other than Asana, there are plenty of options. Some of the popular ones are ClickUp, Trello, and Todoist.
TimeCamp and Asana integration makes project time tracking easier and almost unnoticeable. You'll find that the interface is user-friendly, and reports are quite helpful for improving your productivity.