Jira Time Tracking Report - What You Need to Know

Time tracking reports have long been known as one of the most important resources a business can use to get many insightful pieces of information. Today, we would like to touch on the topic of a specific software program, Jira, how Jira time tracking works, and how you can generate a Jira time tracking report. Also, read on if you want to know how to make your report even more helpful by adding an advanced time-tracking functionality!
To fully explain what the Jira time tracking report gives, it is imperative to write a few words about the software itself. This project management tool enables testing through bug tracking in Agile project management processes. It provides project managers with a useful 360-degree outlook on all important processes. What is more, Jira is also helpful in team-managed projects (where autonomous teams control their working processes and practices). Through Jira, team members can collaborate, and share ideas and crucial documents aiding the project progress. What is more, developers can use a unique query language to simplify deployment and have access to many statistical studies and trend analyses. What can make Jira's detailed reports even better is the time tracking function.
Jira time tracking simply allows one to track time spent on activities, tasks, or sub-tasks. For example, one can see how long the testing takes as well as assess the estimated time remaining until a certain job is finished. However, time tracking not only helps in estimating how long tasks take. Accurate time tracking dives way deeper into team members' performance. What else can it do?
Monitor project progress thanks to time reports
Record your billable hours based on user time log entries
Assign tasks to team members and monitor their progress
Identify any obstacles or inefficiencies in the workflow process
One of the most beneficial features of Jira is the possibility to integrate it with many applications, which will further aid in many areas, such as customer service or even accountancy. You can use such enhancements to indicate realistic estimates of any software development project or multiple projects to your clients. This in turn may reflect positively on the quicker generation of customer invoices and further improve your time management. Let us look closer at how to create reports based on the data from this invaluable time-tracking tool.
Since tracking time is essential, especially in the case of software development projects, we have put together a guide on how to configure Jira time tracking and generate a time tracking report in a few quick steps with the below instructions:
The fix version drop-down menu allows you to select the issues to create a report for. The issues in the Jira time tracking report will belong to the type of version you select.
The sorting drop-down menu allows you to choose the order of the selected issues. 'Most Completed Issues First' will display issues starting with those with the least estimated time remaining, whereas 'Least Completed Issues First' will display issues starting with those with the most estimated time remaining.
You can select which issues the report should list - all or incomplete issues only. Bear in mind that choosing the latter will also exclude the issues with no time entry or no original estimate.
Choose which sub-tasks your report should show. Bear in mind that including sub-tasks in the Jira time tracking report is only possible when you enable them. You can select one of three options:
Only Include Sub-Tasks With the Selected Version - the Jira time tracking report will show sub-tasks that have the parent issue belonging to the selected version
Only Include Sub-Tasks With the Selected Version - the report will show the sub-tasks from the same version or with no version
Include All Sub-Tasks - the report will include all sub-tasks regardless of the versions they belong to.
Jira allows you to generate two types of time-tracking reports:
report including sub-tasks
report excluding sub-tasks
Regardless of which one you choose, the report will consist of the following elements:
It is located at the top of the report; on the right-hand side you can choose to display it in an Excel View
It is displayed below the report type and description; you can view two types of bar graphs here, giving you information on employee performance. The Progress bar shows the number of completed issues (in green) and the number of incomplete issues (in orange). The blue Accuracy bar indicates the accuracy of the original estimate.
Apart from the colors, it is also important to look at the size of the bars. It indicates whether you are on schedule or not (compared to the original estimate):
The Accuracy bar's length and the Progress bar's length are the same= the issues are on schedule with the original estimate,
The Accuracy bar is longer than the Progress bar= you are ahead of schedule,
The Progress bar is longer than the Accuracy bar= you are behind schedule; it will take longer than you assessed to accomplish the tasks;
Depending on the case, the light grey area stands for the overestimation of the time needed to complete the work or the time you are behind. It will be shown either on the Accuracy bar or the Progress bar.
These are shown on the report on the right in the form of four columns corresponding to every task (or sub-task):
Original estimate: the time you assessed it would take to resolve the issue, and finish the project, or task.
Estimated time remaining: the time left from the original estimate.
Time spent: the time already spent working on the project, issue, or task.
Accuracy: the comparison of the original estimate and the actual time spent working on the task, issue, or project
It is worth noting that the report with sub-tasks has the ∑ symbol on the right side of every column. It is the sum of issue metrics and its sub-tasks metrics.
The last line of the report sums up the totals for all time tracking values from the whole report.
The answer is yes but only to some extent. They are sufficient if you are looking for the basic information you need to retrieve from the report. However, if you are looking for additional capabilities, Jira time-tracking plugins available on the market are your best option. One of such programs is TimeCamp.
Benefits of Jira time tracking integration
There are many benefits to using time tracking in Jira. Let us guide you through what you might achieve thanks to integrating Jira and TimeCamp.
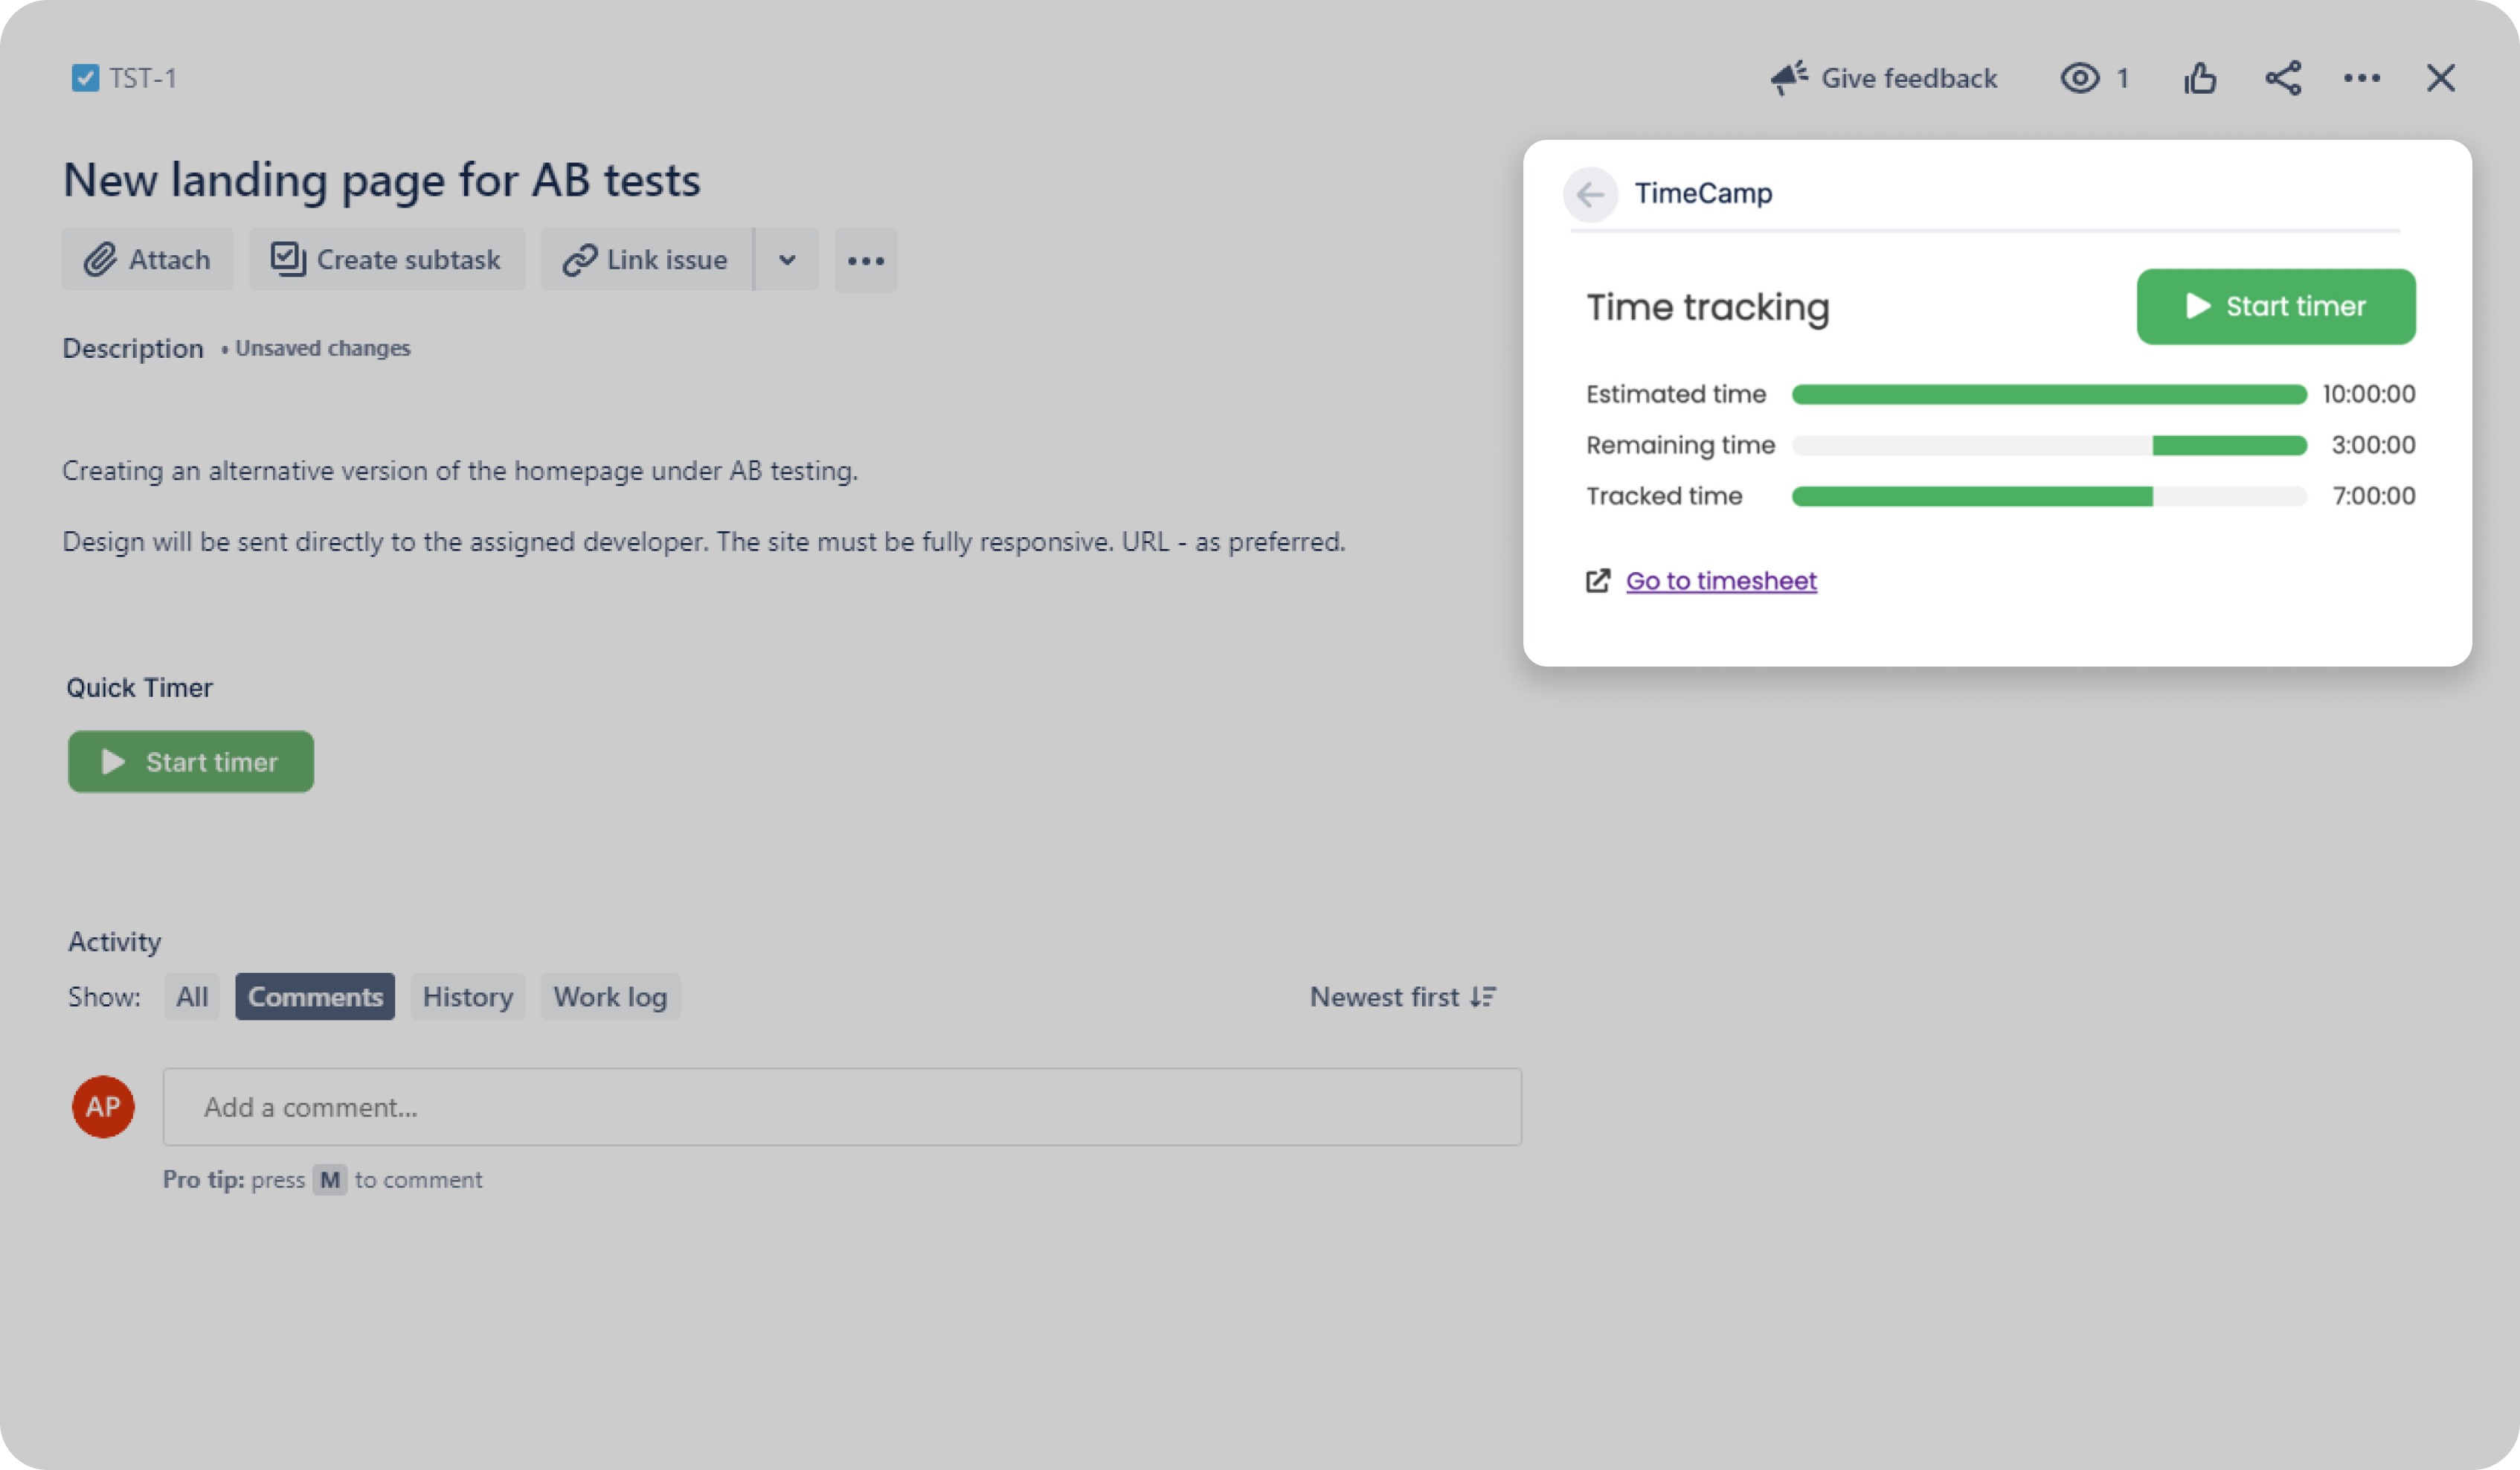
TimeCamp and Jira integration lets you monitor projects and track sub-task time more effortlessly. It provides productivity insights about your team and members with Jira time tracking per user.
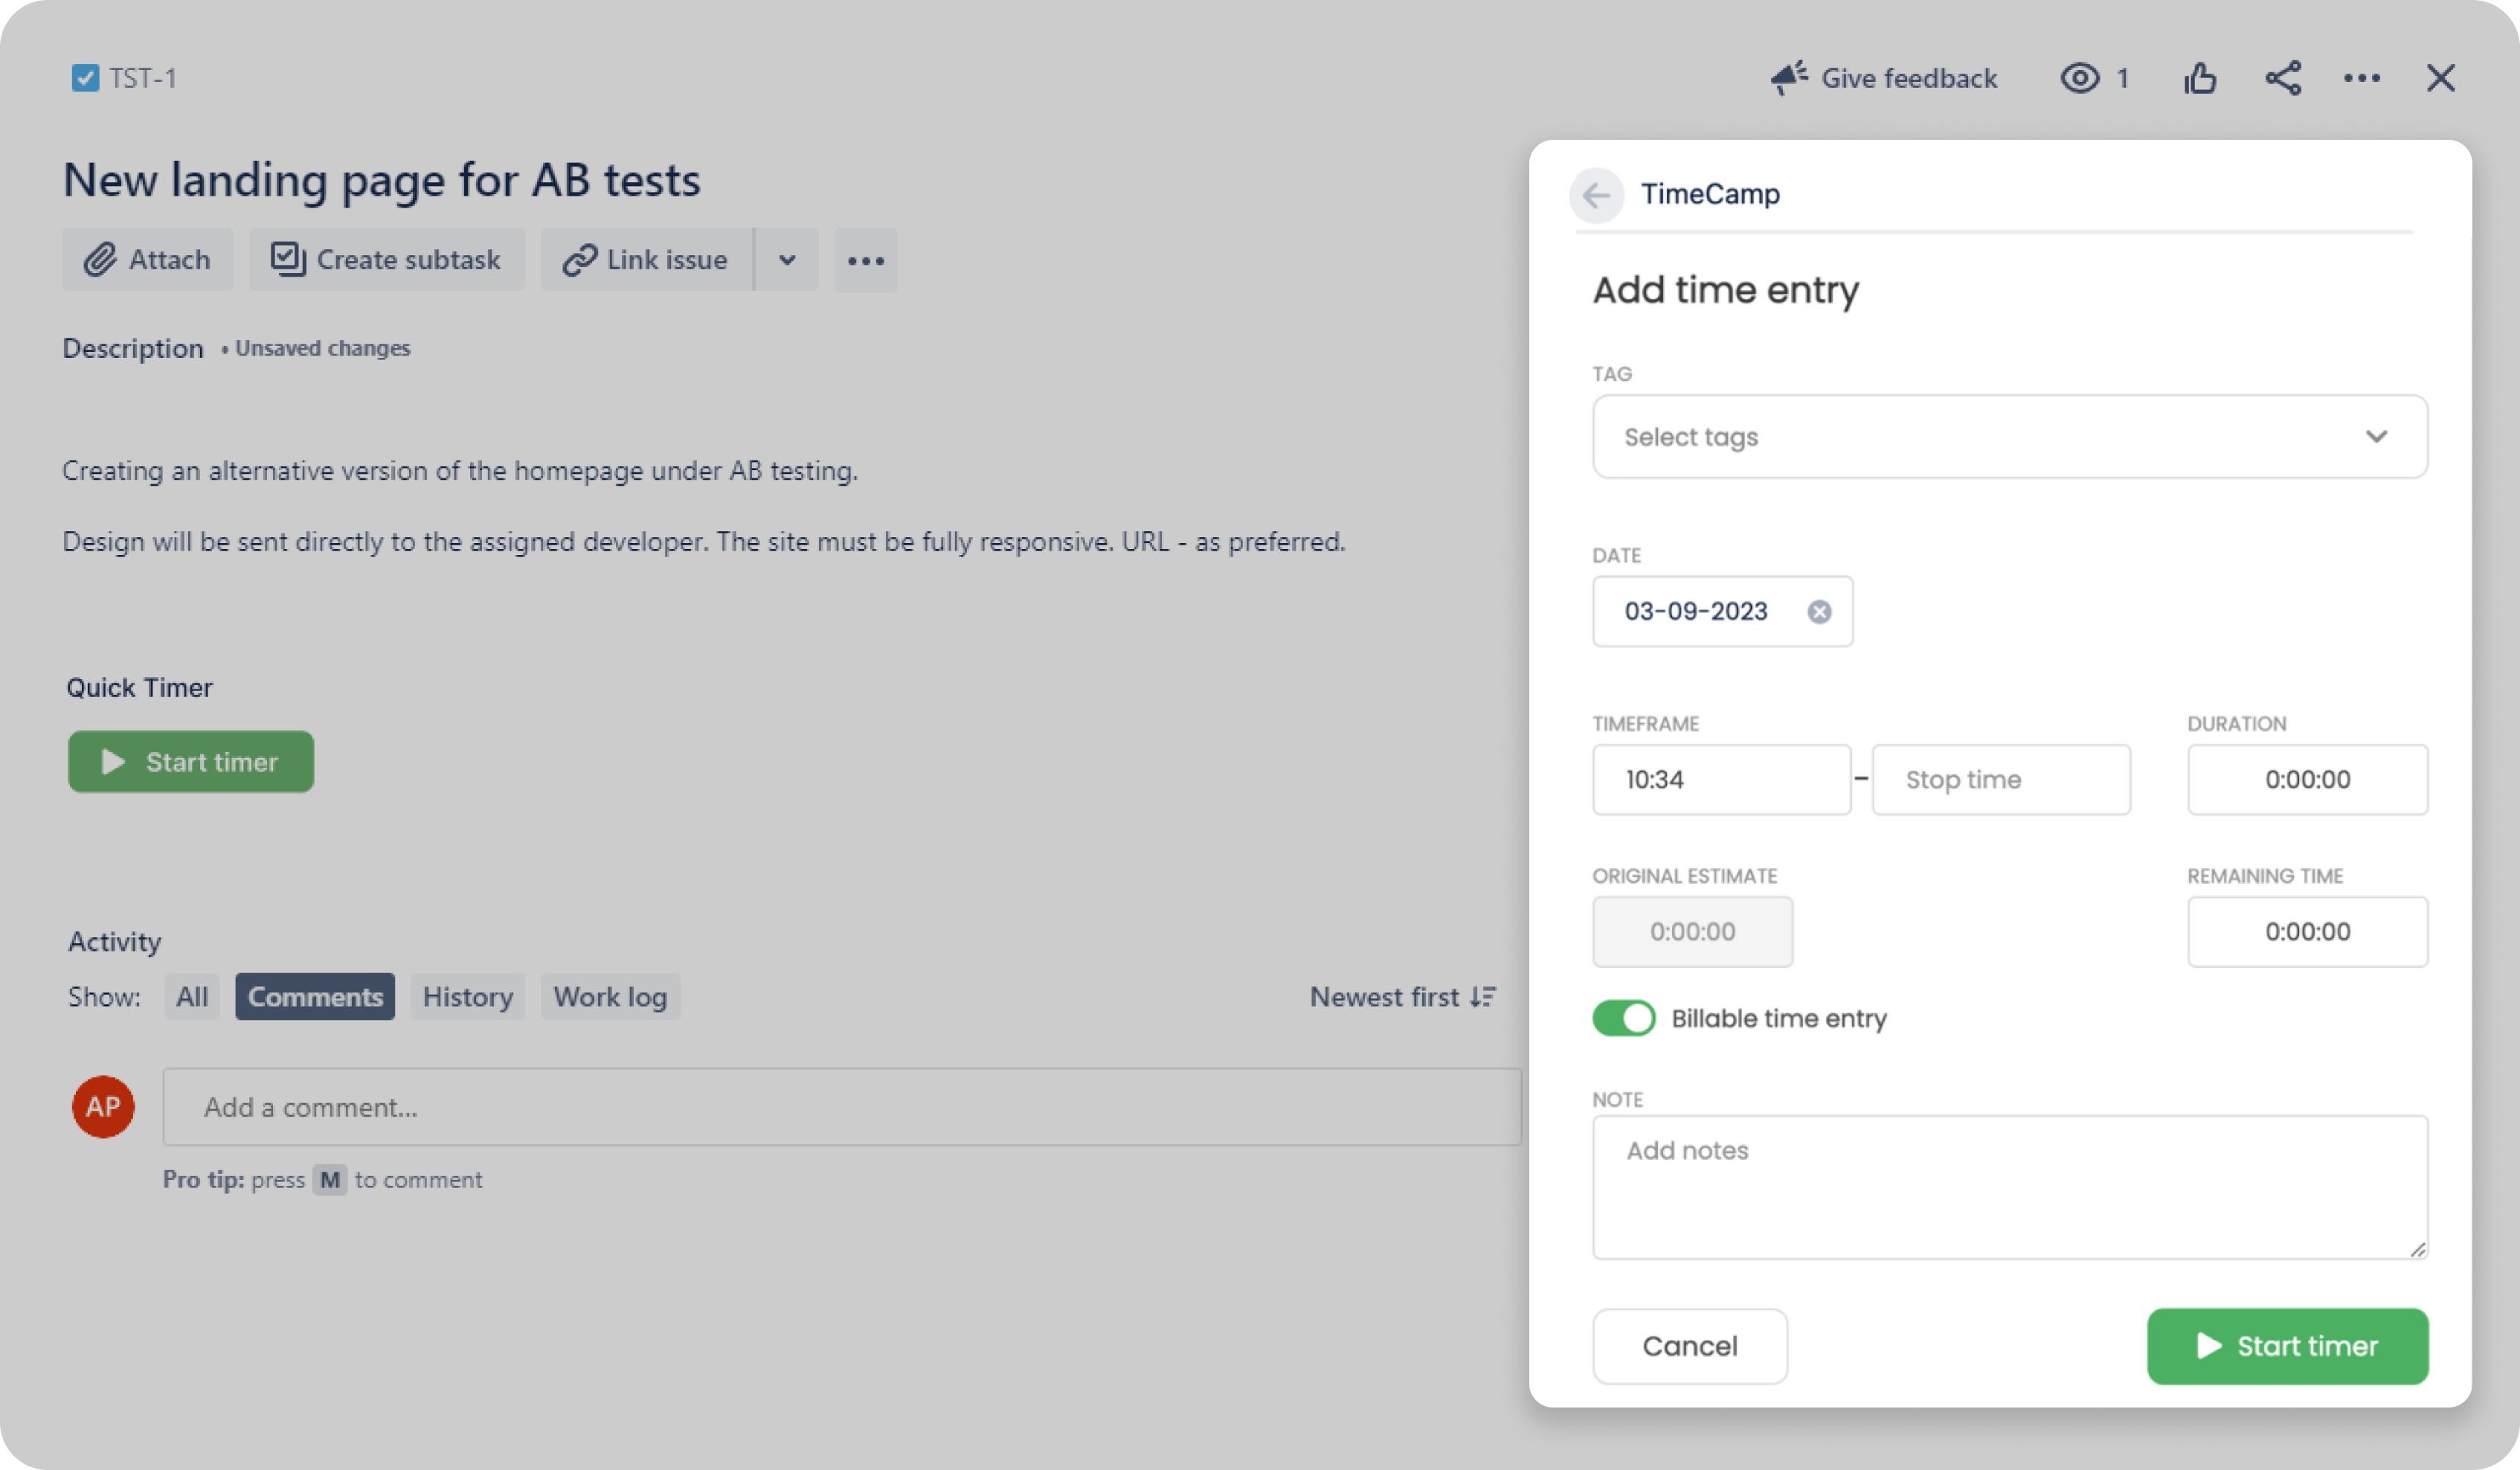
Convenience is a useful add-on. Your team members can log the time whenever they work on the tasks. All they need to do is switch the timer on and off in the time-tracking field. You can also add time entries with tags if you wish to.
Time reporting in Jira with TimeCamp also gives you a clear outlook on the budget of your projects. This time-tracking software helps to better see the inconsistencies between the real time spent on completing the project and the estimated budget. You can use the time-tracking data from reports to keep an eye on your costs and the team's resource use.
Time tracking reports cover such areas as the progress of your current project, its budget, timeline, and your employees' productivity. If you analyze data correctly you can use such reports to identify weaknesses and introduce plans for improving productivity, and therefore profitability.
Time-tracking reports by the user are the perfect tool for measuring the team's performance. Furthermore, it helps identify members who need help, analyze strengths and weaknesses, and see idle time. As a follow up you can provide necessary training in certain areas for team improvement.
In a nutshell, TimeCamp allows you to enjoy the following reporting functions (depending on a chosen plan):
10+ time tracking reports
PDF reports export
Attendance report
Time off report
Overtime report
Excel reports export
Google Sheets reports export
Budget & estimates
Budgeting alerts
Scheduled email reports
Share reports with a link
Pivot table
Fixed fee projects
To enable time tracking in Jira with TimeCamp and fully enjoy all its benefits we must first perform their integration. With the below few steps you will get detailed reporting in Jira in no time:
If you do not have an account with us yet, register here and use this opportunity to bag yourself a free 14-day trial. Bear in mind that you will need Jira administrator's privileges as TimeCamp requires them for integration.
Go to 'Settings' in TimeCamp and then 'Integrations'. Locate Jira in the list of available add-ons and click 'Enable'.
The easiest way to enter your Jira URL address is by copying it from your Jira account. To do that, open a new bookmark in the browser and log in to your Jira account. Copy your Jira URL (remember about the 'https://' prefix) and paste it to the appropriate box in the TimeCamp bookmark.
Now, let's enter details to log in to your Jira account and API token. You must copy the visible characters to the API token field. Next, click on 'Enable the integration' (green button).
From this point, the API token field will stay empty.
You can automatically export your timesheets to Jira, however, it is optional.
You can get all your projects and tasks from Jira in TimeCamp thanks to automatic import. Easy Jira task time tracking and monitoring is now at your disposal!
The Project Management page gives you an insight into all the imported items. They are stored under the main project labeled 'Jira'. Now tracking time is easy and you can get all the reporting you need in your business using TimeCamp's timesheets. TimeCamp Time Tracking application can be found on the Atlassian marketplace for Jira Cloud.
You can also get a Chrome Jira time-tracking plugin!
One of the best benefits of TimeCamp is its free plan for unlimited users. It also allows for unlimited projects, timesheet generation, geofencing, and many more. This cost-effective integration is a great option for your business's basic needs. However, it is worth checking one of our premium plans with features enabling more advanced reporting, billing rates, invoicing, and many more. Check out our full offer and pricing here.
 Time management

